
Honeywell Non-Programmable Thermostat Manual: A Comprehensive Guide
This guide details operation, troubleshooting, and safety for Honeywell non-programmable thermostats. It covers models for smart home upgrades, offering PDF downloads and support access.
Understanding Honeywell Non-Programmable Thermostats
Honeywell non-programmable thermostats offer a simple, reliable way to manage your home’s heating and cooling systems. Unlike their programmable counterparts, these models feature a fixed temperature setting, ideal for users who prefer consistent comfort without the need for scheduling. They are designed for ease of use, making temperature adjustments straightforward and intuitive.
These thermostats regulate coolant recirculation and radiator cooling, maintaining desired engine temperatures. They are a popular choice for smart home integration, providing a foundational element for automated climate control. Understanding the core functionality – setting and maintaining a constant temperature – is key to maximizing their benefits. The manual provides detailed insights into operation, ensuring optimal performance and longevity.
Furthermore, these thermostats often include features like manual override and “Auto”/“Heat/Cool” modes, offering flexibility in system operation. They are a cost-effective solution for basic climate control needs, and readily available support resources are available for assistance.
Thermostat Model Identification
Identifying your Honeywell non-programmable thermostat model is crucial for accessing the correct manual and support resources. Honeywell offers a diverse range of models, each with specific features and wiring configurations. Look for a model number typically located on the thermostat’s faceplate, back housing, or within the battery compartment.
Common series include the T4 Pro series and older, simpler models. The model number often begins with a “T” followed by numbers and letters (e.g., T4000, T6000). Accurate identification ensures you download the appropriate PDF manual, containing detailed instructions tailored to your specific unit.
Referencing the manual is essential for understanding wiring diagrams, troubleshooting, and safety precautions. If you’re unsure of your model, consult Honeywell’s website or contact their customer support, providing any visible markings for assistance. Correct identification streamlines the setup and maintenance process.
Basic Operation: Setting the Temperature
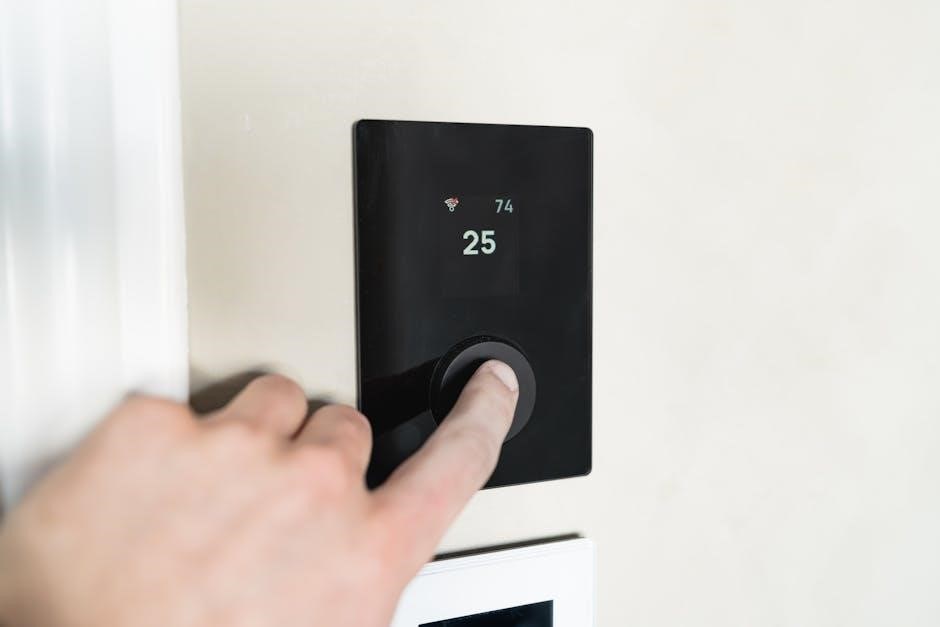
Setting the desired temperature on your Honeywell non-programmable thermostat is straightforward. Typically, you’ll use the up and down arrow buttons on the thermostat’s faceplate to adjust the setpoint. The current room temperature is usually displayed prominently on the screen.

Once you’ve selected your desired temperature, the thermostat will automatically activate the heating or cooling system to maintain that level. Ensure the thermostat is in the correct mode – “Heat,” “Cool,” or “Auto” – to correspond with your needs. The “Auto” mode automatically switches between heating and cooling to maintain the set temperature.
Some models feature a manual override function, allowing temporary adjustments without altering the permanent setting. Always allow sufficient time for the system to respond to temperature changes. Refer to your specific model’s manual for detailed instructions and any unique features.
System Compatibility: Heating & Cooling

Honeywell non-programmable thermostats are designed for broad compatibility with most standard 24-volt heating and cooling systems. This includes furnaces (gas, oil, electric), air conditioners, heat pumps, and boilers. However, compatibility isn’t universal; some advanced or proprietary systems may require specific adapters or aren’t supported.
Before installation, verify your system’s voltage and wiring configuration. Incorrect wiring can damage the thermostat or your HVAC equipment. The thermostat supports single-stage and multi-stage heating and cooling systems, though functionality may vary.
If you have a heat pump, ensure the thermostat is configured correctly for heat pump operation. Consult the wiring diagrams in your manual to ensure proper connections. For systems with specialized features, like economizers, professional installation is recommended to guarantee compatibility and optimal performance.
Battery Replacement Procedures
Honeywell non-programmable thermostats typically require battery replacement to maintain operation during power outages or for models without a common (C) wire connection. The specific battery type varies by model – commonly AA or AAA alkaline batteries are used. Always refer to your thermostat’s manual for the correct battery size.
To replace the batteries, locate the battery compartment, usually on the front or side of the thermostat. Gently open the compartment cover. Remove the old batteries, noting the correct polarity (+ and -). Insert new batteries, ensuring proper alignment.
Close the battery compartment cover securely. The thermostat should power on automatically. If it doesn’t, double-check the battery polarity and ensure the batteries are fresh. Low battery indicators will typically appear on the display before complete battery failure, prompting replacement.
Troubleshooting Common Issues
Common issues with Honeywell non-programmable thermostats include unresponsive displays or inaccurate temperature readings. If the thermostat isn’t responding, first check the batteries, ensuring they are fresh and correctly installed. A power outage or tripped circuit breaker could also be the cause; reset if necessary.
For inaccurate readings, verify the thermostat isn’t exposed to direct sunlight, drafts, or heat sources. Recalibrate the thermostat if your model allows, following the manual’s instructions. If problems persist, check the wiring connections – loose wires can cause erratic behavior.
If the issue continues after these steps, a faulty sensor might be the problem. Consider contacting Honeywell customer support or a qualified HVAC technician for further assistance. Don’t attempt repairs beyond your expertise.
Thermostat Not Responding
If your Honeywell non-programmable thermostat isn’t responding, begin with the simplest checks. First, verify the batteries are fresh and correctly installed, paying attention to polarity. A completely drained battery is a frequent cause. Next, investigate potential power disruptions – check for tripped circuit breakers in your electrical panel that might be affecting the thermostat’s power supply.
Ensure the thermostat display isn’t simply dimmed; some models have a low-light mode. If the issue persists, gently remove and re-seat the thermostat on its base plate to ensure a secure electrical connection. Inspect the wiring for any loose connections or corrosion, though disconnect power before doing so.
If none of these steps resolve the problem, contact Honeywell support for further guidance.
Inaccurate Temperature Readings
If your Honeywell thermostat displays inaccurate temperatures, several factors could be at play. First, ensure the thermostat isn’t directly exposed to sunlight, drafts, or heat sources like lamps or appliances, as these can skew readings. Proper placement is crucial for accurate sensing.

Check for obstructions blocking airflow around the thermostat. Dust accumulation inside the unit can also contribute to inaccuracies; gently clean the exterior with a soft cloth. If the problem continues, consider recalibrating the thermostat if your model allows for temperature offset adjustment – consult the manual for specific instructions.
Persistent inaccuracies might indicate a faulty temperature sensor. In such cases, contacting Honeywell customer support or a qualified HVAC technician is recommended for diagnosis and potential replacement.
Display Features and Indicators
Honeywell non-programmable thermostats utilize displays to communicate system status and settings. Common indicators include the current room temperature, setpoint temperature, and heating or cooling mode. Many models feature icons to signal active operation – a flame icon for heating, a snowflake for cooling, and potentially an “Auto” indicator when the system switches automatically.
Battery indicators alert you when replacement is needed, preventing unexpected thermostat shutdowns. Some thermostats display error codes to help diagnose issues; refer to the manual for code definitions. Understanding these visual cues is essential for effective operation.
The display’s brightness may be adjustable, enhancing visibility in various lighting conditions. Familiarize yourself with the specific icons and symbols on your model for optimal control and troubleshooting.
Manual Override Functionality
Honeywell non-programmable thermostats, despite lacking scheduling, often include a manual override feature. This allows temporary adjustments to the set temperature without altering the permanently set value. Typically, this is achieved by using the up and down temperature adjustment buttons.
The override remains active until the thermostat cycles to a new temperature or is manually reset to the original setting. This is useful for short-term comfort adjustments, like increasing heat during a gathering or lowering it when away for a few hours.
Consult your specific model’s manual for detailed instructions on activating and deactivating the override. Understanding this feature provides flexibility and ensures comfort while maintaining energy efficiency.
Understanding the “Auto” and “Heat/Cool” Modes
Honeywell thermostats frequently feature “Auto” and “Heat/Cool” modes, dictating how the system responds to temperature changes. In “Auto” mode, the thermostat intelligently switches between heating and cooling to maintain the set temperature, ideal for fluctuating weather. The system automatically selects the appropriate function.
“Heat/Cool” mode requires manual selection of either heating or cooling. You must choose which function the thermostat will operate, and it will not switch automatically. This is best when you anticipate consistently needing only one function, like solely heating during winter.
Properly utilizing these modes optimizes comfort and energy efficiency. Refer to your specific model’s manual for detailed operation and to ensure correct system configuration.
Wiring Diagrams and Installation Overview

Installing a Honeywell non-programmable thermostat typically involves connecting wires to designated terminals. Always disconnect power at the breaker before beginning! Wiring diagrams, crucial for correct installation, are found inside the thermostat packaging and in the downloadable manual.
Common terminals include Rh (heating power), Rc (cooling power), W (heating), Y (cooling), and G (fan). Incorrect wiring can damage the system or thermostat. Carefully label existing wires before disconnecting the old thermostat.
The installation process generally involves mounting the baseplate, connecting the wires according to the diagram, attaching the thermostat body, and restoring power. If unsure, consult a qualified HVAC technician. Improper installation voids the warranty and poses safety risks.
Safety Precautions and Warnings
Prioritize safety when installing or servicing your Honeywell thermostat. Always disconnect power at the circuit breaker before handling any wiring. Incorrect wiring can lead to electrical shock, fire hazards, or damage to your HVAC system.
Never attempt repairs beyond your skill level. If you are uncomfortable working with electrical components, consult a qualified HVAC technician. Keep the thermostat dry and avoid exposing it to extreme temperatures or humidity.
This device is not a substitute for a smoke or carbon monoxide detector. Regularly inspect wiring for damage and ensure proper connections. Do not disassemble the thermostat beyond the steps outlined in the manual. Failure to follow these precautions could result in injury or property damage.

Cleaning and Maintenance
Regular cleaning ensures optimal performance of your Honeywell thermostat. Always disconnect power at the circuit breaker before cleaning. Use a soft, dry cloth to wipe the thermostat’s exterior. Avoid abrasive cleaners or solvents, as they can damage the finish.

For the display screen, lightly dampen the cloth with water, ensuring it’s not dripping wet. Gently wipe the screen to remove dust and fingerprints. Do not spray any liquids directly onto the thermostat. Periodically check the battery compartment for corrosion, especially if you live in a humid climate.
Inspect wiring connections annually for tightness and damage. A clean thermostat contributes to accurate temperature readings and extends the lifespan of the device. Avoid exposing the thermostat to excessive dust or debris.
Honeywell Pro Series Thermostat Overview
The Honeywell Pro Series represents a significant upgrade for home climate control. These thermostats regulate coolant recirculation and radiator cooling, maintaining precise engine temperatures – ideal for smart home integration. They offer enhanced features compared to basic non-programmable models, though still prioritize simple operation.
The Pro Series often includes improved display clarity and more responsive controls. While maintaining ease of use, they provide greater accuracy in temperature settings. Manuals for the Pro Series are readily available as PDFs for download, offering detailed instructions and troubleshooting guidance.
These thermostats are designed for diverse applications, from residential homes to light commercial settings. They represent Honeywell’s commitment to reliable and efficient temperature management.
Downloading the Honeywell T4R Thermostat Manual
Accessing the Honeywell T4R Thermostat Manual is straightforward, offering comprehensive support for your device. Numerous online resources provide quick and easy PDF downloads. Searching online for “Honeywell T4R Thermostat Manual Pdf” yields direct links to official documentation.
These manuals detail everything from initial setup and basic operation to troubleshooting common issues. They explore the thermostat’s potential for creativity and innovation, outlining accessory options and advanced features. The PDF format ensures compatibility across various devices – computers, tablets, and smartphones.
Honeywell prioritizes user accessibility, making these manuals readily available. Downloading the manual empowers users to maximize their thermostat’s functionality and resolve issues independently, ensuring optimal performance and longevity.
Contacting Honeywell Customer Support
Honeywell provides multiple avenues for customer support regarding your non-programmable thermostat. If troubleshooting steps within the manual prove insufficient, direct assistance is readily available. For immediate help with sensor issues or fault displays, contacting a professional is recommended.
Honeywell’s customer service team can guide you through complex settings, unlock temperature controls, and address concerns about system compatibility. They can also assist with understanding error codes and initiating warranty claims if necessary. Don’t hesitate to reach out if your unit requires professional attention.
Locating contact information is simple; visit the official Honeywell website or search online for “Honeywell customer support.” Expect knowledgeable representatives prepared to resolve your thermostat-related inquiries efficiently and effectively.
Resources for Honeywell Thermostat Manuals (PDF)
Finding a Honeywell non-programmable thermostat manual in PDF format is straightforward. Numerous online resources offer downloadable manuals for various models, ensuring you have access to detailed instructions and diagrams. Several websites specialize in hosting appliance manuals, including those from Honeywell.
A quick internet search for “Honeywell Pro Series Thermostat Manual PDF” will yield numerous results. These PDFs typically cover installation, operation, troubleshooting, and safety precautions. Downloading the manual allows offline access, convenient for reference during installation or maintenance.
Ensure the PDF you download corresponds to your specific thermostat model number for accurate information. Honeywell’s official website also provides a manual archive, offering a reliable source for authentic documentation. Utilizing these resources empowers you to effectively manage and maintain your thermostat.